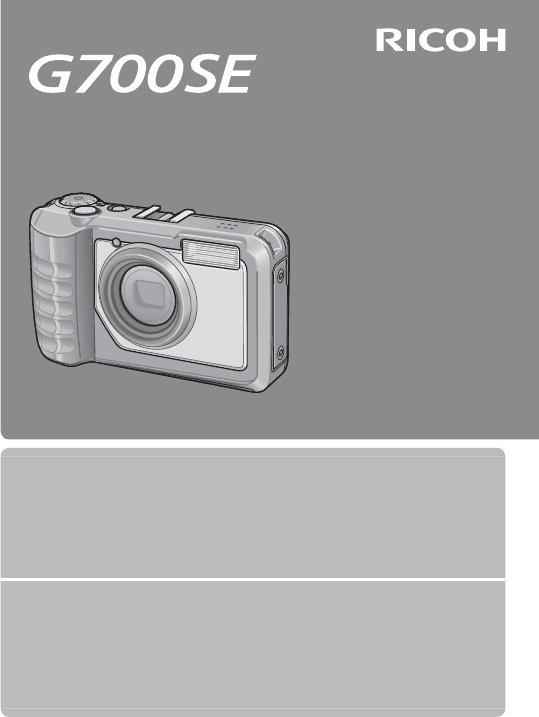
Ricoh G700 SE Guia do Utilizador
Consulte online ou descarregue Guia do Utilizador para Câmaras bridge Ricoh G700 SE. Ricoh G700 SE User Guide Manual do Utilizador
- Página / 197
- Índice
- RESOLUÇÃO DE PROBLEMAS
- MARCADORES
- Camera User Guide 1
- Ricoh Co., Ltd 2
- Safety Precautions 3
- Warning 4
- Caution 5
- Using the Manuals 6
- Contents 7
- Advanced Operations 49 8
- Shooting Menu 62 9
- Playback Menu 72 10
- Setup Menu 82 11
- Camera Memo Menu 94 12
- Expanded Settings Menu 98 13
- Bluetooth® 105 14
- Wireless Networks 112 14
- GPS 136 14
- Barcode Reader 142 15
- Direct Printing 144 15
- Appendices 159 15
- Operations 16
- Packing List 17
- How to Use the Mode Dial 18
- Names of Parts 19
- Rear View 20
- Picture Display 21
- Movie Mode 22
- Still Image Mode 22
- Battery Level Indication 23
- Getting Ready 24
- Logo side 28
- Turning the Power On/Off 29
- Basic Shooting 32
- Shooting range 33
- Subject to be focused 33
- Using the Zoom Function 34
- Using the Flash 36
- Using the Self-timer 37
- Shooting in CALS Mode 38
- Playing Back Images 39
- 81 Frames 40
- Date of Recording 40
- Enlarging Images 41
- Deleting Files 42
- Deleting Multiple Files 43
- Changing the Display with 45
- During Playback Mode 46
- Level indicator display 48
- About the Histogram Display 49
- Advanced 50
- 1 ADJ. Button Functions 51
- Scene Mode Options 53
- Using Skew Correction Mode 55
- 3 Shooting and Viewing 56
- Playing Back Movies 57
- 4 Memos 58
- Viewing Memos 59
- 5 Using Custom Help 60
- Using Custom Help 61
- Select [Yes] 61
- Display the menus 62
- Press DISP 62
- 6 Shooting Menu 63
- Shooting Menu Options 64
- Shooting Menu 65
- Hold :Hold : 68
- Auto Bracket 69
- Exposure Compensation 70
- White Balance 71
- ISO Setting 72
- 7 Playback Menu 73
- Playback Menu Options 74
- Playback Menu 75
- Contrast Correction 78
- Skew Correction 79
- Protect 80
- MENU/OK button 81
- Press the D button 81
- Selecting Multiple Files 81
- Viewing Pictures on TV 82
- 8 Setup Menu 83
- Setup Menu Options 84
- Setup Menu 85
- Reg. My Settings 89
- Digital Zoom Image 90
- Choose/Change Password 91
- Keyboard 92
- Enter a password of up to 16 92
- Re-enter the password 92
- Password Protection 93
- 9 Camera Memo Menu 95
- Camera Memo Menu 96
- 10 Expanded Settings Menu 99
- Expanded Settings Menu 100
- 11 Bluetooth® 106
- Entering a Password 107
- (Bluetooth®) 108
- One-Touch Transfer 110
- Two-Touch Transfer 111
- Auto Transfer 112
- 12 Wireless Networks 113
- Configuring the Host 114
- Wireless Networks 115
- Click the desired tab 115
- Click [Add] 115
- Enter a name 115
- Adjust settings 115
- Save settings and exit 116
- Detailed Setups Tab Settings 117
- [Wireless LAN] tab 118
- [FTP Send] tab 119
- Start SR-10 121
- Click [Apply] 122
- Click [Quit] 122
- Click [Start] 123
- Upload images 123
- Select [Yes] 126
- Click [Save in File] 126
- Select [Send To] 128
- View settings 128
- Edit settings 128
- Connecting Using [WPS Button] 130
- Connecting Using [WPS PIN] 130
- Connecting Using [Scan] 131
- (Wireless LANs) 132
- Connecting to a GPS Unit 137
- Bluetooth®-equipped GPS Units 138
- The GPS Data Display 140
- Recording GPS Data 141
- Viewing GPS Data 142
- 14 Barcode Reader 143
- Barcode Reader 144
- 15 Direct Printing 145
- Printing Still Images 146
- Direct Printing 147
- Printing Several Still Images 148
- Printing Reports 149
- For Windows 150
- CD-ROM Setup 151
- Installing Software 152
- Installing Other Software 154
- Installing Adobe Reader 154
- Copy photos to the computer 156
- For Macintosh 158
- 17 Appendices 160
- Appendices 161
- FTP send setting errors 162
- Camera Troubleshooting 164
- Shooting 165
- Playback/Deleting 168
- Other Problems 169
- Available Settings 170
- Specifications 172
- Bluetooth® Communication Port 174
- Turned Off 177
- Using a Wide Conversion Lens 180
- Optional Filters 180
- Using the External Flash 181
- Using Your Camera Abroad 182
- Cautions on Use 183
- Care and Storage 185
- Replacing the rubber packing 186
- Warranty and Servicing 187
- Notes to users 188
- INFORMATION TO THE USER 189
- Note to Users in Canada 189
- *L758 2971* 197
Resumo do Conteúdo
Camera User GuideThe serial number of this product is given on the bottom face of the camera.Basic OperationsIf you are using the camera for the first
97 Playback Menu 72Using the Menu ...72Playback Menu
99Expanded Settings Menu10 Note -------------------------------------------------------------------------------------For some functions, the setting s
100Expanded Settings Menu10 GPS Data SelectGP.136Choose which device is used when both a GP-1 and a Bluetooth®- equipped GPS unit are connected. Choos
101Expanded Settings Menu10 Compass CalibrationIf a GP-1 is connected, its compass can be calibrated by highlighting [Yes], pressing MENU/OK, and the
102Expanded Settings Menu10 Communication ModeChoose whether data transmitted using [File Send] (GP.74) and quick send (GP.104) are sent via wireless
103Expanded Settings Menu10 Bluetooth Pass KeyEnter a password for Bluetooth® connections, allowing the camera to supply the password automatically wh
104Expanded Settings Menu10 Auto DeleteSelect [On] to automatically delete files from the camera after they have been transmitted to a computer. Quic
105Bluetooth®1111 Bluetooth®The camera supports both Bluetooth® and wireless LAN for wireless data transfer. Bluetooth® can be used to connect simulta
106Bluetooth®11Entering a PasswordIf an authentication key, or password, is required for connection to a Bluetooth® device, a message will be displaye
107Bluetooth®11Transferring Images During Playback (Bluetooth®)Images can be copied to Bluetooth® devices using the [File Send] option in the playback
108Bluetooth®11 Skipping Steps 1 and 2--------------------------------------------------------------Once you have selected a host and password, the o
108 Setup Menu 82Using the Menu ...82Setup Menu Optio
109Bluetooth®11 Interrupting Transfer/Terminating the Connection -------------------------To interrupt transfer, rotate the mode dial or press DISP.,
110Bluetooth®11Two-Touch TransferTo upload your most recent photo:1 Press $.• A confirmation dialog will be displayed. (If this is the first time you
111Bluetooth®11Auto TransferSelect [Auto] to automatically upload photos as they are taken. Note -----------------------------------------------------
112Wireless Networks1212 Wireless NetworksPictures can be uploaded from the camera over a wireless Local Area Network (LAN). Before accessing a wirele
113Wireless Networks12 Caution ---------------------------------------------------------------------------------• The camera’s wireless transmitter h
114Wireless Networks123 Click the desired tab.• In the [Detailed Setups for selections] dialog, choose from the following tabs:- Network: Enter an I
115Wireless Networks127 Adjust settings in the remaining tabs.• Repeat Steps 3–6 to adjust settings in the remaining tabs.8 Save settings and exit.•
116Wireless Networks12Detailed Setups Tab Settings[Network] tabItem Name DescriptionHost SetupHost NameCamera PasswordThese settings are not required
117Wireless Networks12[Wireless LAN] tab Note -------------------------------------------------------------------------------------Wireless LAN settin
118Wireless Networks12Item Name DescriptionNetwork Key Enter the security key. Select a key type from [String] and [Hex] and enter an encryption key i
11SD WORM: Disabling Password Protection for SD WORM Cards ... 93Menus: Adding Password Protection to the Menus ...
119Wireless Networks12Item Name DescriptionDoes not send file whose name already existsIf this option is selected, images will not be uploaded if an i
120Wireless Networks12Configuring a G700SE-only FTP ServerIf the computer is not currently configured for use as an ftp server, the supplied SR-10 so
121Wireless Networks122 Adjust settings.34211 Specify: Choose a destination folder. Choose [Server] to upload images to the folder listed in the [Fold
122Wireless Networks12Uploading Images to the SR-10 ServerTo upload images to the SR-10 server, transfer the host list to the camera and then follow t
123Wireless Networks12Creating a Host List and Transferring It to the CameraOnce hosts have been configured using ST-10, you can create a host list fo
124Wireless Networks126 Click [Transfer to Camera].• Enter the camera password when prompted and click [OK] to begin transfer. If you wish to update
125Wireless Networks1210 Select [Yes].• Press $ to highlight [Yes] and press MENU/OK to copy the host list to internal memory and return to the expand
126Wireless Networks122 Choose a destination.• Navigate to the desired folder on the computer hard drive and enter a file name (note that although yo
127Wireless Networks12Viewing and Editing the Host ListThe camera can be used to view and edit the host list.1 Select [Send To].• After turning the c
128Wireless Networks12Simple Connections for Wireless LANsUsing the [Simple Connection] option in the expanded settings menu (GP.98), you can connect
1210 Expanded Settings Menu 98Using the Menu ...98Ex
129Wireless Networks12Connecting Using [WPS Button]1 Select [WPS Button] for [Simple Connection].• Highlight [Simple Connection] in the expanded sett
130Wireless Networks12Connecting Using [Scan]1 Select [Scan] for [Simple Connection].• Highlight [Simple Connection] in the expanded settings menu (G
131Wireless Networks12Transferring Images During Playback (Wireless LANs)The [File Send] option in the playback menu (GP.72) can be used to upload ima
132Wireless Networks12 Transferring Multiple Selected Images -----------------------------------------To transfer multiple selected images, select th
133Wireless Networks12 Caution ---------------------------------------------------------------------------------• Before uploading images over a wire
134Wireless Networks12 Note -------------------------------------------------------------------------------------• Photos can not be uploaded if: [Of
135Wireless Networks12Auto TransferSelect [Auto] to automatically upload photos as they are taken. Caution -------------------------------------------
136GPS1313 GPSWhen an optional GP-1 GPS unit or Bluetooth®-equipped GPS unit is connected, the camera can record the GPS data (including latitude, lo
137GPS13Bluetooth®-equipped GPS UnitsBluetooth®-equipped GPS units supply GPS data to the camera wirelessly.1 Select [Bluetooth Serial].• Highlight [
138GPS13 Note -------------------------------------------------------------------------------------[Send To] lists the most recent device first. Term
1311 Bluetooth® 105Bluetooth® Connections ... 105Entering a Password ...
139GPS13The GPS Data DisplayDuring shooting, GPS data are displayed as shown at right.4:3 F3 F4:3 F4:3 F9999999999999999111359.2˚//NNW/mag359.2˚ / /NN
140GPS13 Caution ---------------------------------------------------------------------------------Some time may be required to update GPS data. If the
141GPS13Viewing GPS DataGPS data recorded with pictures can be viewed during playback by pressing the DISP. button until GPS data are displayed.F3.5F3
142Barcode Reader1414 Barcode ReaderThe BR-1 Barcode ReaderWhen connected to the camera, the BR-1 barcode reader (available separately) can be used
143Barcode Reader14 Note -------------------------------------------------------------------------------------• The BR-1 is not equipped with a batte
144Direct Printing1515 Direct PrintingAbout the Direct Print FunctionThe Direct Print standard enables direct printing from a camera to a printer by
145Direct Printing15 Caution ---------------------------------------------------------------------------------• Do not force the USB cable into the t
146Direct Printing153 Select an item and press the $ button to view the options available.• When [Connecting…] is displayed, the connection to the pr
147Direct Printing15 Note -------------------------------------------------------------------------------------• To specify the settings as the defau
148Direct Printing15 Note -------------------------------------------------------------------------------------• Only images with a printer symbol (p
1414 Barcode Reader 142The BR-1 Barcode Reader ... 14215 Direct Printing
149Copying Pictures to a Computer via USB1616 Copying Pictures to a Computer via USBThe screen images shown here may differ from the images displayed
150Copying Pictures to a Computer via USB16 Caution ---------------------------------------------------------------------------------• The CD-ROM sup
151Copying Pictures to a Computer via USB16Installing SoftwareClick [Installing the software] to install the following software.Software Description D
152Copying Pictures to a Computer via USB161 Click [Installing the software].Windows 2000/Windows XP• After a while, the [Choose Setup Language] scre
153Copying Pictures to a Computer via USB16 Caution ---------------------------------------------------------------------------------If EC1 is already
154Copying Pictures to a Computer via USB161 Click [Browse CD-ROM Content].• The files on the CD-ROM are listed.2 Open the folder for your language i
155Copying Pictures to a Computer via USB16Copying Pictures to Your ComputerFollow the steps below to copy pictures to your computer.1 Connect the cam
156Copying Pictures to a Computer via USB163 Disconnect the USB cable when transfer is complete.• Click the [Safely Remove Hardware] or [Unplug or Ej
157Copying Pictures to a Computer via USB16For MacintoshThis camera supports the following Macintosh operating systems.• Mac OS 9.0 to 9.2.2• Mac OS
158Copying Pictures to a Computer via USB16 Caution ---------------------------------------------------------------------------------• Do not turn of
Basic OperationsIf you are using the camera for the first time, read this section.Packing List ...16How to Use
159Appendices1717 AppendicesTroubleshooting Error MessagesIf an error message is displayed on the screen, check the information on the reference page
160Appendices17Error Message Cause and Solution Refer toCan not —. * Selected option can not be applied to image more than once, or image was created
161Appendices17Error Message Cause and Solution Refer toThe IP address is already in use The same IP address as the camera exists in the destination n
162Appendices17Error Message Cause and Solution Refer toThe folder does not exist. The specified inbox folder does not exist on the destination. Set t
163Appendices17Camera TroubleshootingPower SupplyProblem Cause SolutionRefer toThe camera does not turn on.The battery is exhausted or not inserted.Ch
164Appendices17ShootingProblem Cause SolutionRefer toThe camera does not shoot even if you press the shutter release button.Battery is exhausted. Chec
165Appendices17Problem Cause SolutionRefer toThe picture is blurred (The J symbol appears).You moved the camera when pressing the shutter release butt
166Appendices17Problem Cause SolutionRefer toThe image lacks natural color.The picture was shot in conditions that made it difficult for auto white ba
167Appendices17Playback/DeletingProblem Cause SolutionRefer toCannot play back, or the playback screen does not appear.The camera is not in playback m
168Appendices17Other ProblemsProblem Cause SolutionRefer toCannot load the SD memory card.The card is facing the wrong way. Load correctly. P.27The ca
16If you are using the camera for the first time, read this section.Packing ListOpen the package and make sure all the items are included.* The actual
169Appendices17Available SettingsThe following table lists the settings available in each shooting mode.5VWN (Macro) *1✓✓✓✓✓✓—✓F (Flash)✓✓✓✓✓✓✓—t (Sel
170Appendices175VWShooting MenuExposure Compensation✓✓✓✓✓—✓—White Balance *13✓✓✓✓✓—✓✓ISO Setting✓✓——✓—✓—Edit Detection *14✓✓✓✓✓✓✓—Restore Defaults✓———
171Appendices17SpecificationsNo. of effective pixels (camera) Approx. 12.10 million effective pixelsImage Sensor 1/2.3˝ CCD (Approx. 12.40 total milli
172Appendices17Number of Recorded PixelsStill Image 4000 × 3000, 3984 × 2656, 2592 × 1944, 2048 × 1536, 1600 × 1200, 1280 × 960, 640 × 480Movie 1280 ×
173Appendices17*1 The picture quality mode that can be set varies depending on the image size.*2 Compatible with DCF and DPOF. DCF is the abbreviati
174Appendices17Number of Images That Can Be StoredThe following table shows the approximate number of images that can be recorded in the internal mem
175Appendices17• The maximum recording time is the estimated total recording time. Movies may be up to 4 GB in size. The maximum length is 12 minutes
176Appendices17Defaults Settings/Functions Whose Defaults Are Restored When the Camera Is Turned OffTurning the camera off may reset some function set
177Appendices17{: setting is saved ×: setting is resetFunction Default SettingsSetup AF Auxiliary Light{OnOperation Sounds{AllVolume Settings{ (
178Appendices17{: setting is saved ×: setting is resetFunction Default SettingsExpanded SettingsGPS Datum{WGS-84GPS Disp Mode{LAT/LONGPS Lock{OffGP
17If you are using the camera for the first time, read this section.How to Use the Mode DialSet the mode dial to the desired mode before shooting sti
179Appendices17Using a Wide Conversion LensA wide conversion lens (DW-5) enables shooting at a lens magnification of 0.8 times (equivalent to a 35 mm
180Appendices17Using the External FlashYou can attach an external flash and other accessories (available in stores) to the accessory shoe.You can on
181Appendices17Using Your Camera AbroadBattery Charger (Model BJ-6)The battery charger can be used in regions with a current of 100–240 V, 50 Hz/60 Hz
182Appendices17Cautions on UseWaterproofing/Dust Resistance• The camera complies with the JIS/IEC Class 8 standard for water resistance and the JIS/I
183Appendices17• This product was manufactured for use in the country in which it was purchased. The warranty is only valid in the country in which th
184Appendices17Care and StorageCare• Please note that if fingerprints, dirt, etc. get onto the lens, picture quality will suffer.• Any dust or dirt
185Appendices17Replacing the rubber packing To maintain the waterproof ability, replace the rubber packing every two years, regardless of whether it
186Appendices17Warranty and Servicing1. This product is backed by a limited warranty. During the warranty period mentioned in the Warranty supplied w
187Appendices17Notes to usersThis Transmitter must not be co-located or operated in conjunction with any other antenna or transmitter.The available sc
188Appendices17INFORMATION TO THE USERUSA FCC Part 15 Class BThis equipment has been tested and found to comply with the limits for a Class B digital
18If you are using the camera for the first time, read this section.Names of PartsCameraFront View2314 5 6 78910Item Name Refer to1 AF Auxiliary Ligh
189Appendices17Notice to Users in EEA CountriesDeclaration of ConformityThis product complies with the essential requirements and provisions of Direct
190Appendices17Dit product voldoet aan de essentiële eisen en bepalingen van Richtlijn 1999/5/EG van het Europees Parlement en de Raad van 9 maart 199
191Appendices17Hinweis für Benutzer in Ländern des europäischen WirtschaftsraumesDieses Produkt befindet sich in Übereinstimmung mit den grundlegenden
192IndexAAccessory Shoe ...18, 180ADJ./MEMO Button ...19, 50ADJ Button Setting ...
193GPS Track Time ...100Grid Guide Display ...44Grid Guide Displa
194TTerminal Cover ...19Text Mode ...52Thumb
Telephone Support Numbers in EuropeUK (from within the UK) 0203 239 6327 (from outside the UK) +44 203 239 6327Deutschland (innerhalb Deutschland
*L758 2971*From environmental friendliness to environmental conservation and to environmental managementRicoh is aggressively promoting environment-fr
1PrefaceThis manual provides information on how to use the shooting and playback functions of this product, as well as warnings on its use.To make the
19If you are using the camera for the first time, read this section.Rear View12 37645831391210111615 1417Item Name Refer to1 Picture Display P.202
20If you are using the camera for the first time, read this section. Picture DisplayExample of Picture Display when Shooting PicturesF3.5F3.5F3.5F3.5
21If you are using the camera for the first time, read this section.64064064064000 :00 00 /00 :020200: 00 /00: 0200: 00 /00: 02Shutter button : St
22If you are using the camera for the first time, read this section. Note ----------------------------------------------------------------------------
23If you are using the camera for the first time, read this section.Getting ReadyTurn the power on and get ready to shoot. Note ----------------------
24If you are using the camera for the first time, read this section. Caution -------------------------------------------------------------------------
25If you are using the camera for the first time, read this section. About Formatting ----------------------------------------------------------------
26If you are using the camera for the first time, read this section.Charging the Rechargeable Battery (DB-65)DB-65 Li-ion batteries must be charged
27If you are using the camera for the first time, read this section.Loading the Battery and SD Memory CardAfter recharging the rechargeable battery,
28If you are using the camera for the first time, read this section.Removing the Rechargeable BatteryTurn the battery/card cover knob toward the M mar
2Safety PrecautionsWarning SymbolsVarious symbols are used throughout this instruction manual and on the product to prevent physical harm to you or ot
29If you are using the camera for the first time, read this section. Note ----------------------------------------------------------------------------
30If you are using the camera for the first time, read this section.Setting the Date and Time1 Press the !"#$ buttons to set the year, month, dat
31If you are using the camera for the first time, read this section.Basic ShootingNow you are ready.Shooting in Auto Shooting Mode (Focus and Shoot)T
32If you are using the camera for the first time, read this section.4 To take a picture with the subject in the foreground in focus against a backgrou
33If you are using the camera for the first time, read this section. Preventing Camera Shake -------------------------------------------------------
34If you are using the camera for the first time, read this section. Using the Digital Zoom --------------------------------------------------------
35If you are using the camera for the first time, read this section.Using the FlashYou can select the flash mode that best suits your shot. At the ti
36If you are using the camera for the first time, read this section. Note ----------------------------------------------------------------------------
37If you are using the camera for the first time, read this section.Shooting in CALS ModeIn CALS mode, you can shoot photos in a quality and size sui
38If you are using the camera for the first time, read this section.Playing Back ImagesViewing Your ImagesTo select playback mode, press the 6 (Playb
3 Warning● Turn off the power immediately in the event of abnormalities such as smoke or unusual odors being emitted. Remove the battery as soon as po
39If you are using the camera for the first time, read this section.81 FramesTo display pictures 81 at a time, press 9 in the 20-frame view.Press the
40If you are using the camera for the first time, read this section.Enlarging ImagesTo zoom in on a photo that is currently displayed full frame, pres
41If you are using the camera for the first time, read this section. Deleting FilesYou can delete files from the SD memory card or internal memory. N
42If you are using the camera for the first time, read this section.Deleting Multiple FilesYou can select multiple files for simultaneous deletion eit
43If you are using the camera for the first time, read this section.Specifying a Range of Multiple Files1 Press the !" buttons to select [Delete
44If you are using the camera for the first time, read this section.Changing the Display with the DISP. ButtonPressing the DISP. button allows you to
45If you are using the camera for the first time, read this section. Note ----------------------------------------------------------------------------
46If you are using the camera for the first time, read this section.Maximizing the Picture Display BrightnessHold the DISP. button down in shooting mo
47If you are using the camera for the first time, read this section.Level indicator displayWhen level:The level indicator becomes green, indicating th
48If you are using the camera for the first time, read this section.About the Histogram DisplayWhen Histogram is on, a histogram appears in the lower
4● Keep the equipment out of the reach of children.● Do not touch the internal components of the equipment if they become exposed as a result of being
1234567891011121314151617Advanced OperationsRead this section when you want to learn more about the different camera functions.1 ADJ. Button Function
50ADJ. Button Functions11 ADJ. Button FunctionsThe ADJ./MEMO button has the following functions.1 Assigning four functions from the shooting menu (A
51ADJ. Button Functions1 Shifting the AE and AF TargetsYou can shift the target for automatic exposure (AE) and/or auto focus (AF).Available Setting D
52Taking Pictures in Scene Mode22 Taking Pictures in Scene ModeScene Mode OptionsYou can use scene mode to select from among five still image modes
53Taking Pictures in Scene Mode2 Caution ---------------------------------------------------------------------------------When using [Zoom Macro], you
54Taking Pictures in Scene Mode2Using Skew Correction Mode1 Select [Skew Correct Mode] in the scene mode menu and press the MENU/OK button.2 Press th
55Shooting and Viewing Movies33 Shooting and Viewing MoviesShooting MoviesSelect [Movie] in the scene mode menu to record movies with sound. Frame si
56Shooting and Viewing Movies3Playing Back MoviesTo play back movies, follow the steps below.1 Select the movie you want to play back in playback mode
57Memos44 MemosFor information on creating, transferring, and configuring memo lists, see the supplied “Software User Guide”.Image files created with
58Memos43 Press MENU/OK.• Press MENU/OK to accept the current memo.4 Take photographs.• The memo will be added to all new photos.Viewing MemosThe pr
5Using the ManualsThe following two manuals are included with your G700SE.“Camera User Guide” (This booklet)This guide explains the usage and function
59Using Custom Help55 Using Custom HelpPressing DISP. when [On] is selected for [Custom Help] (GP.104) in the expanded settings menu (GP.98) displays
60Using Custom Help56 Select [Yes].• Highlight [Yes] and press MENU/OK to copy the images to internal memory and return to the expanded settings menu
61Using Custom Help5Viewing Custom Help1 Display the menus.• Press MENU/OK to display the shooting or playback menu.2 Press DISP.• Custom help is di
62Shooting Menu66 Shooting MenuThe shooting menu is used to adjust camera settings when taking pictures. To display the shooting menu, press the MENU
63Shooting Menu6Shooting Menu Options DensityAdjust contrast when using the [Text Mode] option in scene mode. SizeGP.174Choose the size of pictures ta
64Shooting Menu6 Continuous ModeThe camera records photographs one after the other while the shutter release button is pressed. Select [Off] to take
65Shooting Menu6 Interval ShootingTake photos automatically at intervals ranging from five seconds to three hours in five-second increments.Hours Min
66Shooting Menu6 White BalanceGP.70Adjust the white balance. ISO SettingGP.71Adjust ISO sensitivity. Edit DetectionIf pictures taken with [On] sele
67Shooting Menu6 Focus Manual Focus (MF)Manual focus (MF) can be used to focus at a selected distance when the camera is unable to focus using autofoc
68Shooting Menu6 Auto BracketChoose the type of bracketing performed. Auto BracketIf [On] is selected, the camera will take three photos each time t
6ContentsSafety Precautions ...2Using the Manuals ...
69Shooting Menu6 Exposure CompensationUse exposure compensation to vary exposure from the value selected by the camera. Choose from values between –2
70Shooting Menu6 White BalanceAdjust the white balance so that a white subject will appear white. At purchase, the white balance mode is set to [Auto
71Shooting Menu6Manual1 Measure white balance.• After selecting [Manual] in the white balance menu and placing a blank piece of paper or other white
72Playback Menu77 Playback MenuThe options in the playback menu can be used to perform a variety of operations on existing pictures. To display the p
73Playback Menu7Playback Menu Options ResizeYou can reduce the image size of a shot still image to create a new file with a different image size.Origi
74Playback Menu7 Recover FileRestore deleted files. Caution ------------------------------------------------------------------------------Deleted fil
75Playback Menu7 TrimCreate a cropped copy of the current photograph.Press 8 or 9 to adjust the crop size and press !, ", #, or $ to position the
76Playback Menu7• The size of the image after cropping depends on the size of the original and the size of the crop (the crop displayed when you sele
77Playback Menu7 Contrast CorrectionCreate copies that have been processed to adjust brightness and contrast.Highlight [Contrast Correction] in the p
78Playback Menu7 Skew CorrectionCreate copies that have been processed to reduce the effects of perspective on rectangular objects, such as message b
7Advanced Operations 491 ADJ. Button Functions 50Selecting Shooting Menu Options Assigned to the ADJ./MEMO Button ...50Shifting the AE and AF Targe
79Playback Menu7 Protect[Protect] allows you to protect files from being accidentally deleted.If [1 File] is selected, you can protect or unprotect th
80Playback Menu73 Select the last frame and press the MENU/OK button.• Repeat Steps 2 and 3 to select multiple ranges.4 Press the D button.107107/111
81Playback Menu7 Note -------------------------------------------------------------------------------------To remove the DPOF settings for multiple st
82Setup Menu88 Setup MenuYou can change the camera settings by displaying the setup menu from the shooting menu (GP.62) or playback menu (GP.72).Usin
83Setup Menu88 Press MENU/OK, or press # and then MENU/OK.• The setup menu disappears and the camera is ready for shooting or playback.• The setup m
84Setup Menu8 ADJ Button Setting 1–4GP.50Choose the role performed by the ADJ./MEMO button. AF Auxiliary LightIf [On] is selected, the AF auxiliary l
85Setup Menu8 Digital Zoom ImageGP.89Choose [Auto Resize] to record pictures taken with digital zoom at actual size, [Normal] to enlarge image data fr
86Setup Menu8 Card Sequence No.When you switch SD memory cards, you can set your camera to continue consecutive numbering from the previously loaded c
87Setup Menu8 CALS Pic QualityChoose picture quality and size options for CALS mode (GP.37). Start Date/TimeSelect [On] to display the current time a
88Setup Menu8 Reg. My SettingsSave current camera settings in [MY1] or [MY2]. Settings saved in [MY1] are recalled when the mode dial is rotated to T
86 Shooting Menu 62Using the Menu ...62Shooting Menu
89Setup Menu8 Digital Zoom ImageIf [Normal] (the default option) is selected for [Digital Zoom Image] , digital zoom will enlarge image data from t
90Setup Menu8 Choose/Change PasswordChoose the password that must be entered to access password-protected settings (GP.92). The password can be a bar
91Setup Menu8Keyboard1 Enter a password of up to 16 characters.• Highlight characters using !, ", #, or $ and press MENU/OK to enter the highlig
92Setup Menu8 Password ProtectionChoose the camera functions protected with the password selected using [Choose/Change Password] (GP.90). Five option
93Setup Menu8SD WORMNo password is required when SD WORM cards (GP.24) are used. If no memory card is inserted or another type of card is used, you w
949Camera Memo Menu9 Camera Memo MenuUsing the Menu1 Press the MENU/OK button.• The shooting menu (or the playback menu) appears.2 Press # to high
959Camera Memo MenuCamera Memo Menu Options Camera Memo Mode “Software User Guide”GP.28Choose from the following options:Available Settings Descriptio
969Camera Memo Menu Display Memo at StartupSelect [On] to display the camera memo dialog when the camera is turned on. Note --------------------------
979Camera Memo Menu Barcode TypeChoose from the following options:Available Settings DescriptionAuto The camera automatically detects the barcode typ
98Expanded Settings Menu1010 Expanded Settings MenuUsing the Menu1 Press the MENU/OK button.• The shooting menu (or the playback menu) appears.2 P
Manuais e produtos relacionados com Câmaras bridge Ricoh G700 SE
 (196 páginas)
(38 páginas)
(184 páginas)
(37 páginas)
(204 páginas)
(31 páginas)
(83 páginas)
(222 páginas)
(192 páginas)
(6 páginas)
(196 páginas)
(38 páginas)
(184 páginas)
(37 páginas)
(204 páginas)
(31 páginas)
(83 páginas)
(222 páginas)
(192 páginas)
(6 páginas)
 (6 páginas)
(8 páginas)
(6 páginas)
(8 páginas)
(6 páginas)
(253 páginas)
(6 páginas)
(8 páginas)
(6 páginas)
(8 páginas)
(6 páginas)
(253 páginas)
 (250 páginas)
(161 páginas)
(250 páginas)
(161 páginas)
© 2020, manymanuals-pt.com. Todos os direitos reservados. | 0.056 s |
 Manymanuals.com
 Manymanuals.de
 Manymanuals.fr
 Manymanuals.it
 Manymanuals.pl
 Manymanuals.cz
 Manymanuals.es
 Manymanuals-pt.com
Comentários a estes Manuais